Home of Almost Paradise Designs Art Jewelry and Paradise Cove Fibers and Textiles

The Gardens at Paradise Cove: Specializing in Dye Plants, Culinary and Medicinal Herbs

Showing posts with label fiber. Show all posts

Thursday, January 23, 2014

This Is The Way We Wash Our Sheep ... Small Batch


Good things come in small packages ...


Washing to maintain lock structure ...


My favorite detergents.  About one tablespoon per wash pot.


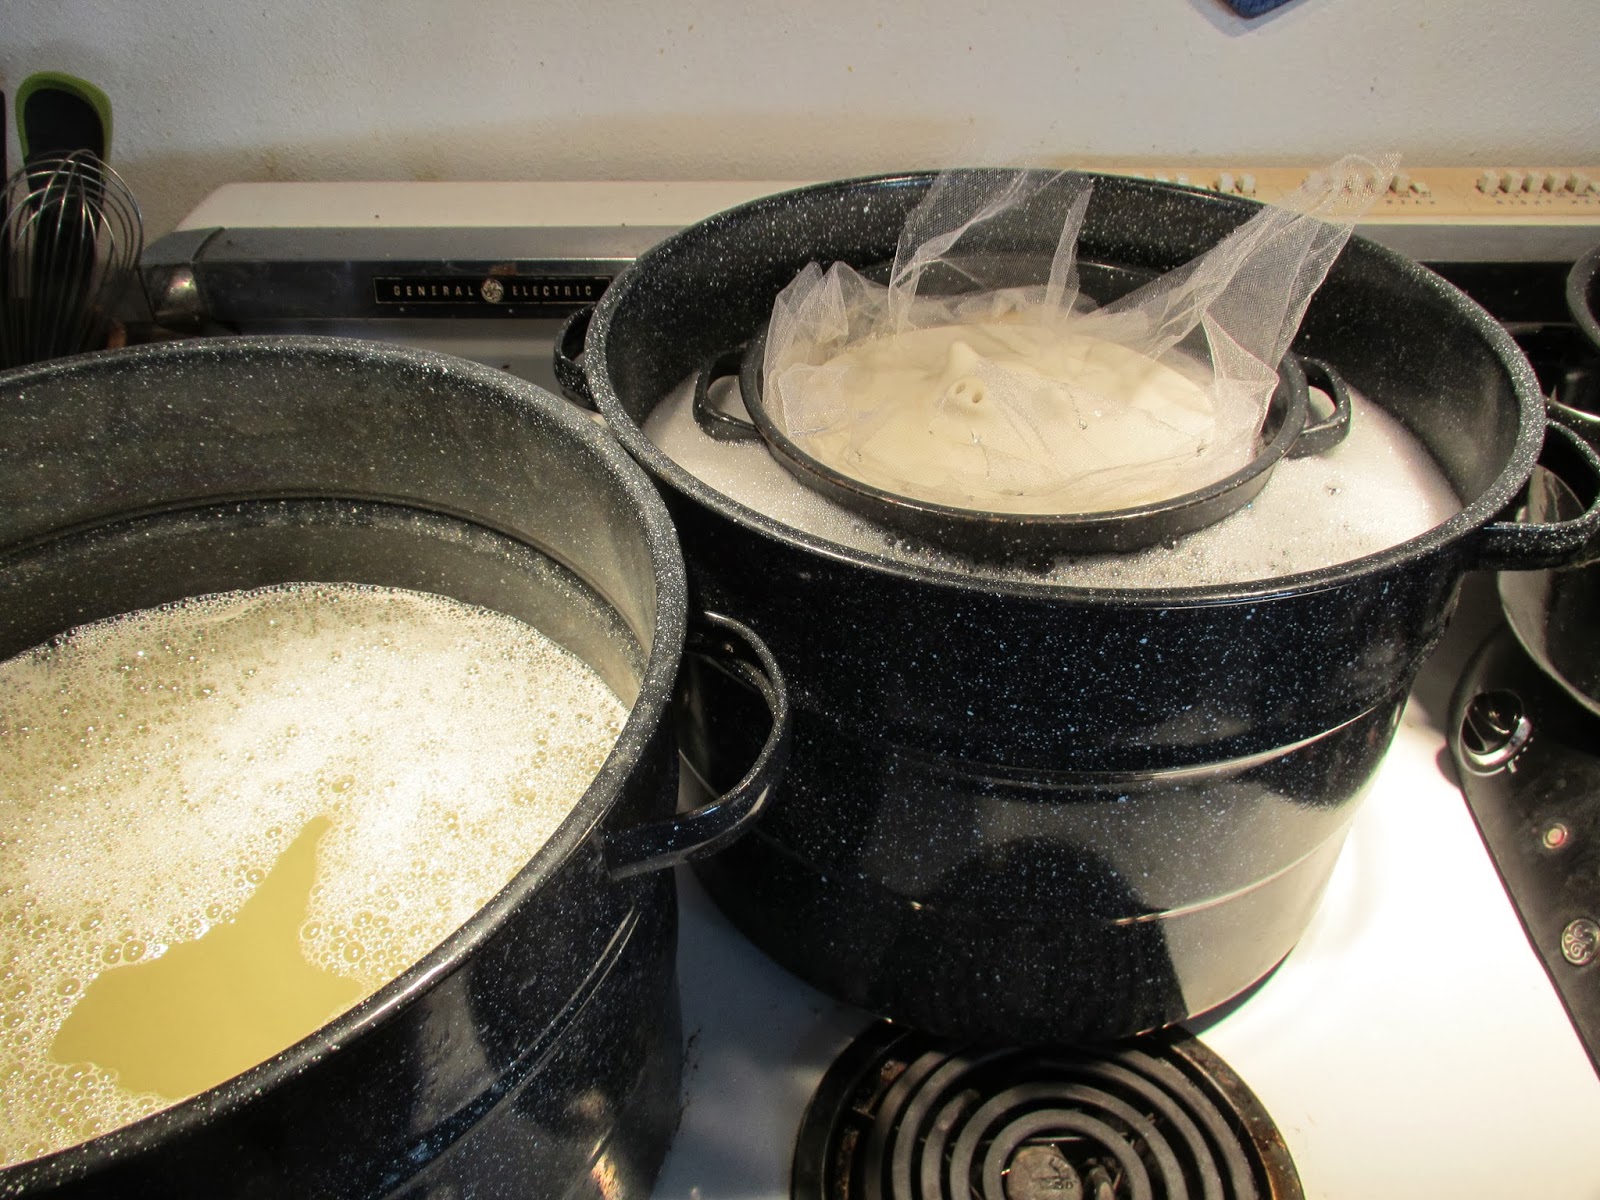
Layer tulle netting between layers of locks in the pasta drainer.


Otoshi buta (落し蓋, literally: drop-lid) are Japanese-style drop-lids for use in Japanese cooking. These round lids float on top of the liquid in a pot while simmering foods. They ensure that the heat is evenly distributed and reduce the tendency of liquid to boil with large bubbles. This reduces the mechanical stress on the food and keeps fragile ingredients in their original shape. Otoshi buta are almost always made from wood, so they have to be soaked in water for a few minutes before use to avoid absorbing the flavor of the dish and disturbing the flavor of the next dish cooked using the otoshi buta. After use, the otoshi buta is washed and dried completely before storing. Wikipedia


2 washes; 2 rinses.  160 - 180 degrees; each pot slightly hotter than the one before it.  Put the oshi buta on top of  the layers of fleece and drop it into the pot of hot water.  Leave it there for 30 - 45 minutes.


"Twirl" (You've Got Mail!)  with the pasta drainer between baths to remove excess water and soap.  Twirl in one direction only.


Depending on the condition of the fleece, the wash water can be used more than once.  Dispose of the water OUTSIDE (pour it on a plant; it makes great fertilizer).  Do not pour down the drain.  
Wax (lanolin) + drain pipes = big plumber's bill!! 


2 rinses; "twirl" in between and after final rinse.


Separate layers of locks ...


And set out to dry.


A dehumidifier helps drying.


Deborah's washed locks!


Enjoy!


Sunday, November 6, 2011

Irish Oats

I've been playing in my fiber studio!


Irish Oats colorway ... felted hat and scarf.

Enjoy!


Thursday, February 4, 2010

Adventures in Color...Tints, Tones and Shades....

Tints are a pure color mixed with white (or diluted with water for our dyeing purposes). Tones are color mixed with gray and shades are color mixed with black. By mixing the colors with gray or black I achieved the earthier, muted colors that I am interested in working with.

I made many mixtures of warm blue-violet with water, gray (10% black and 90% water) and black dye.


After making many yarn test samples I came up with mixtures that gave me the colors I was looking for.


I made test dye samples for several more colors, added them to my color wheels with notes on the porportions of color, water and black dye.....


….and then it was play time!!

"Moss"
Blue Faced Leicester wool, Mulberry silk and firestar

"Blueberries"
Merino wool, Mulberry silk and angelina


"Boysenberries"
Merino, angora, silk and angelina

I am very happy with the batts I made with the fiber from my first hand mixed dye experiments.  The "Boysenberries" colorway is exactly what I wanted for a shawl that I have been planning for myself.  I'm going to have to dye up a large batch of fiber and I know I can match the color again ... I have the recipes on my color wheel cards!  Then I'm going to spin it up and crochet myself a lovely shawl...and I'm already thinking of designs for the shawl pin I'll make to go with it...something with silver and amethyst I think....

Enjoy!

Deb

Tuesday, February 2, 2010

Adventures in Color...Making the Color Wheels...

Now for the fun part! It's time to dye some fiber samples...


My dyeing set up

I cut 1 to 2 yard lengths of an undyed wool yarn and soaked them in a mixture of water with a few drops of Synthrapol (a wtting agent - it allows the wool to soak up the water) and a small sprinkle of citric acid (you can use white vinegar instead – I don't like the smell).

I placed a piece of the yarn on a small square of plastic wrap and added enough dye to completely wet it.


 I wrapped up the plastic wrap around the yarn and placed it in a small canning jar which I had previously numbered from 1 to 10 with a Sharpie marker.

I kept track of which color went into which jar in my dyeing journal.

I put the 10 canning jars on the turntable of my old microwave (IMPORTANT! Keep a separate set of utensils, pots, jars, etc. for dyeing...NEVER use them again for food preparation).


I microwaved the jars with the wrapped yarn for 3 minutes. There was a lot of popping sounds (like making microwave popcorn) as the plastic wrap expanded with the heat.


I let the wrapped yarn cool (they were VERY hot!) and then removed the plastic wrap and rinsed any excess dye out in clean water.


To keep my colors from getting mixed up while they were drying I punched holes in a piece of cardstock and labeled the holes for each color.


When the yarns were all dry I made up color wheels; one each for the warm and the cool palettes. I cut 1 ½ by 5 ½ pieces of card stock, punched a hole in one end and labeled it with the color.


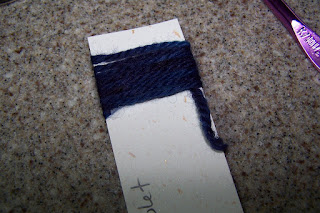
I taped one end of the yarn to the cardstock and then wrapped the yarn around it 6 or 7 times, pulled the end of the yarn under the wraps and secured it with a half hitch knot. I repeated this for all of the yarns and placed then on metal rings (hardware store...usually near where the make keys).


And here are the two color wheels (or fans)...


Coming soon...tints, tones and shades...

Enjoy!

Deb

Wednesday, January 20, 2010

Adventures in Color...Primaries and Secondaries

I decided to use Jacquard Acid Dyes for my wool dyeing needs.  They are readily available, easy to use and produce beautiful, brilliant colors.  By choosing to mix my own colors from the primaries (blue, yellow and red) and then use black to create tones and shades of the pure colors,  I only have to purchase 6 colors of dye to produce an almost unlimited palette of colors for my dyeing needs.

Supplies:


Jacquard Acid Dyes - 2 half ounce containers of Yellow Sun-601; 1 half ounce container each of Cherry Red-617, Turquoise-624, Brilliant Blue-623, Fire Red-618, Jet Black - 639
Containers for dye: 6 - 32 ounce, 6 - 16 ounce, 12 - 8 ounce
 (I recommend the plastic ones from Dharma Trading)
Particle mask
Rubber Gloves
Notebook and Pencil
Puppy Training Pads (really!)
Glass Measuring Cups
Small Plastic Bathroom Cups
Plastic Funnel
Gram Scale and/or Plastic Measuring Spoons
Sharpie Marker
Labels
Bamboo Skewers for mixing (inexpensive, disposable and planet friendly)
Old Clothes to wear while mixing and dyeing


Safety Precautions:
Always wear a particle mask when handling the dry dye powder.
Wear rubber gloves while hadling powders and liquid dye.


Jacquard produces two sets of primary colors; one to make "warm" colors and the other to make "cool" colors.

The Warm Palette consists of:
Yellow Sun
Cherry Red
Turquoise

The Cool Palette consists of:
Yellow Sun
Fire Red
Brilliant Blue

I use the metric system (grams and milliliters) to measure my water and dyes.  You can use teaspoons and ounces if you like, the amounts are close enough for dyeing purposes.

Mixing the Primary Colors:

I cover my work are with a puppy training pad, absorbant side up.  It absorbs liquid spills and makes it easy to take care of any spilled dye powder.


To make a 1% dye solution of the primary colors measure 10 grams (4 tsp) dye powder into a small plastic bathroom cup (wear a particle mask and rubber gloves while handling the dye powders).


Transfer the dye powder into a small glass measuring cup.  Put 500 ml (2 cups) of water into a larger glass measuring cup and microwave on high for 3 minutes.  Add about 100 ml (1/4 cup) hot water to the dye powder and stir until the powder dissolves (the yellow dye powder is diffucult to get into solution; it helps to use boiling water and keep stirring until no clumps remain).

Use the plastic funnel to transfer the dissolved dye to a 32 ounce container.  Rinse the remaining dye in the small measuring cup with more hot water from the large cup and transfer to the large dye container.  Add the rest of the hot water to the dye container.  Microwave another 500 ml (2 cups) of water and add to the dye container.  Mix well (I use a long bamboo skewer), cap and lable.


Hint: Using the puppy training pads make it easy to handle spilled dye powder...


Just wet it down with a wet paper towel and allow to dry...


Mixing the Secondary Colors:

The secondary colors (green, violet and orange) are made by mixing two of the primary colors.
For the Warm Palette secondaries:
Warm Green = Yellow Sun + Turquoise
Warm Orange = Yellow Sun + Cherry Red
Warm Violet = Cherry Red + Turquoise

For the Cool Palette secondaries:
Cool Green = Yellow Sun + Brilliant Blue
Cool Orange = Yellow Sun + Fire Red
Cool Violet = Fire Red + Brilliant Blue

To make 500 ml (2 cups) of the secondaries use 250 ml (1 cup) of each of the primaries.


Hint:  It is not good for the environment to put the dyes down a drain.  I use a bucket about half full of water to rinse the cups and spoons as I use them, rinsing each piece as used in the same water again and again in the same bucket of water and then giving a final rinse in the sink after almost all of the dye has been washed off in the bucket.  It is easy to recover the dye from the bucket later with some scrap woolen fiber.
 
Coming soon....Mixing the Tertiary Colors.
 
Enjoy!
 
Deb